 Organic Workflow
 Peptide Workflow
 Scale-Up Flash Purification
  Sample Preparation
 Biomolecule Purification
 Oligo synthesis
 Scavengers and Reagents
 Service & Support
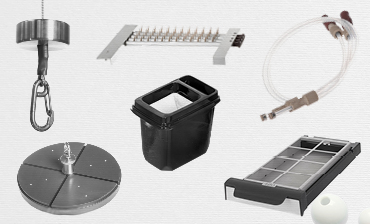 Accessories & Spare parts
 Investors
 Reports & News
 The Share
 Corporate Governance
 Calendar
 Sustainability
 Our Offering
 Our History
 Our Locations
 Leadership
In this post I’d like to discuss the benefits of running routine maintenance procedures on your Biotage® 5000 Extractor system. There are a whole host of reasons you should be running routine maintenance on your extractor, the biggest of which is the cost savings from expensive repairs that might be needed if the instrument breaks down. Ensuring there is no cross contamination between samples, maintaining optimal performance, and prolonging the life of the instrument are a few other reasons why a small amount of your time now can lead to huge benefits down the road.
How to Clean Your 5000:
If you’ve just run a particularly “dirty” sample, perhaps it’s an oil/grease sample, or one with a lot of solid particulates, it’s always a good idea to follow this up with the Biotage Clean and Background check method. Running this method will ensure that any remaining residues or solid materials will be effectively removed from the front end of the sample flow path, including the elution and solvent-waste pathway (Note: the internal sample flow path will not be cleansed with this method). This will help ensure that the elution valves and solvent lines are all kept clean and will remain working properly over the lifetime of the instrument, and that there is no possibility of carryover from any previous samples. This method is often used by Biotage Service personnel when performing a PM visit or repair.
In the Admin Menu, under the Method Library tab locate the “Clean and Background Check” method. Review the solvent list and ensure that the solvents required for this method are currently available on your system (acetone and methylene chloride). If you need to add solvents, be sure to do so prior to running the method, otherwise you’ll see an error upon clicking run. (If you wish to edit the method with different solvents, you’ll need to duplicate the cleaning method and save with a new name). Check your system and ensure the solvent bottle have sufficient volume, that the solvent waste container has enough space for any waste generated, and also be sure to check that you’ve loaded an empty bottle into each station that you wish to clean. Next, assign the method by selecting it from the drop down menu, do one final check, and then click on the Start Run button.
The extractor will now run the method and the cleaning procedure will begin. Towards the end of the cleaning method you will be prompted to remove and clean the collection flask, this is only necessary if you’d like to analyze the elutant for residual compounds to see if any material or contamination has been left behind in the extractor. This may not be necessary, depending on the purposes of your cleaning and how in-depth you wish to go. For most, simply running the cleaning procedure is enough, as this will ensure that your system has been cleaned and is prepped for future use.
Cleaning the Water Inlet Valve, Thermistor sensor, and Solvent lines:
Another good way to keep your 5000 running smoothly is to remove and clean the water inlet valve (WIV). It is recommended to clean this valve after each run, and also to store this off the system to make sure that the gasket is not becoming compressed over time. Remove the valve from the extractor and rinse thoroughly in warm tap water. While doing so, rotate the valve stem slowly through 360˚ until it returns to the open position. This may be difficult by hand, so be sure to have your WIV Wrench handy (see Figure 1). Do a visual check of the WIV gasket, and be sure to contact Biotage 1-Point Support if you notice any cracks or tears on this gasket (see Figure 1, the gasket is PN: 02-0560-02SP, Qt. 12). Once the WIV has been rinsed, you can now reinstall it on your system if running another sample, or simply leave it near the system in preparation for future use.
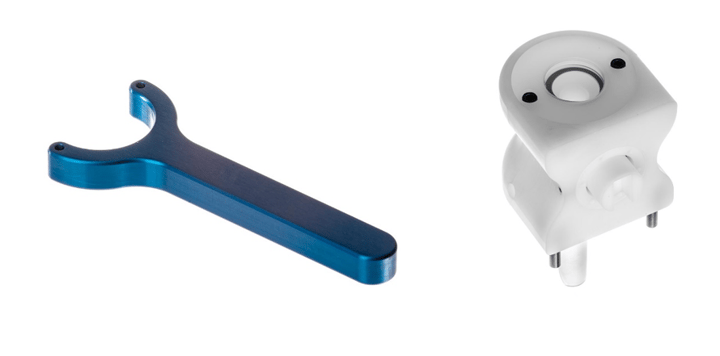
Figure 1: Water inlet valve, or WIV, shown here on the right, and the WIV wrench (left). The gasket on the WIV can be seen on the top.
The thermistor sensor, located underneath the WIV, can simply be wiped down with acetone or similar cleaning solvent. It does not need to be removed to be cleaned, you can leave it on the system. Be gentle, as this sensor does not need to be forced or pushed around. Cleaning this sensor will help make sure no cross contamination occurs between samples.
The solvent lines should not need to be cleaned very often, depending on the amount of traffic on the system, however it is a good idea to clean these periodically to ensure no material builds up in the bottles/lines. Remove the solvent lines with attached inlet filters and place all in a single bottle with a cleaning solvent (we recommend using acetone or DCM). After soaking for several minutes, remove the lines and place into a clean empty beaker. Next, run the solvent delivery pump while alternatively selecting ports 1-7 on the solvent select valve, which can be done in the Diagnostic screen. This will flush out any residual cleaning solvent before you place the lines back into the appropriate clean solvent bottles. Lastly, be sure to prime the lines after you’ve finished to ensure the next sample run on the system does not have any issues.
And that’s it! Spending a small amount of time ensuring that your Biotage® Horizon 5000 Extractor is clean and running properly can have HUGE cost saving benefits for you and your lab. If you do notice anything odd or unusual about your system, don’t hesitate to reach out to Biotage 1-Point support, where a team of highly skilled personnel are available to help you diagnose issues or problems and will dispatch the appropriate Field Service Engineers if needed.